
Photos and Videos for an Online Store: Shot List
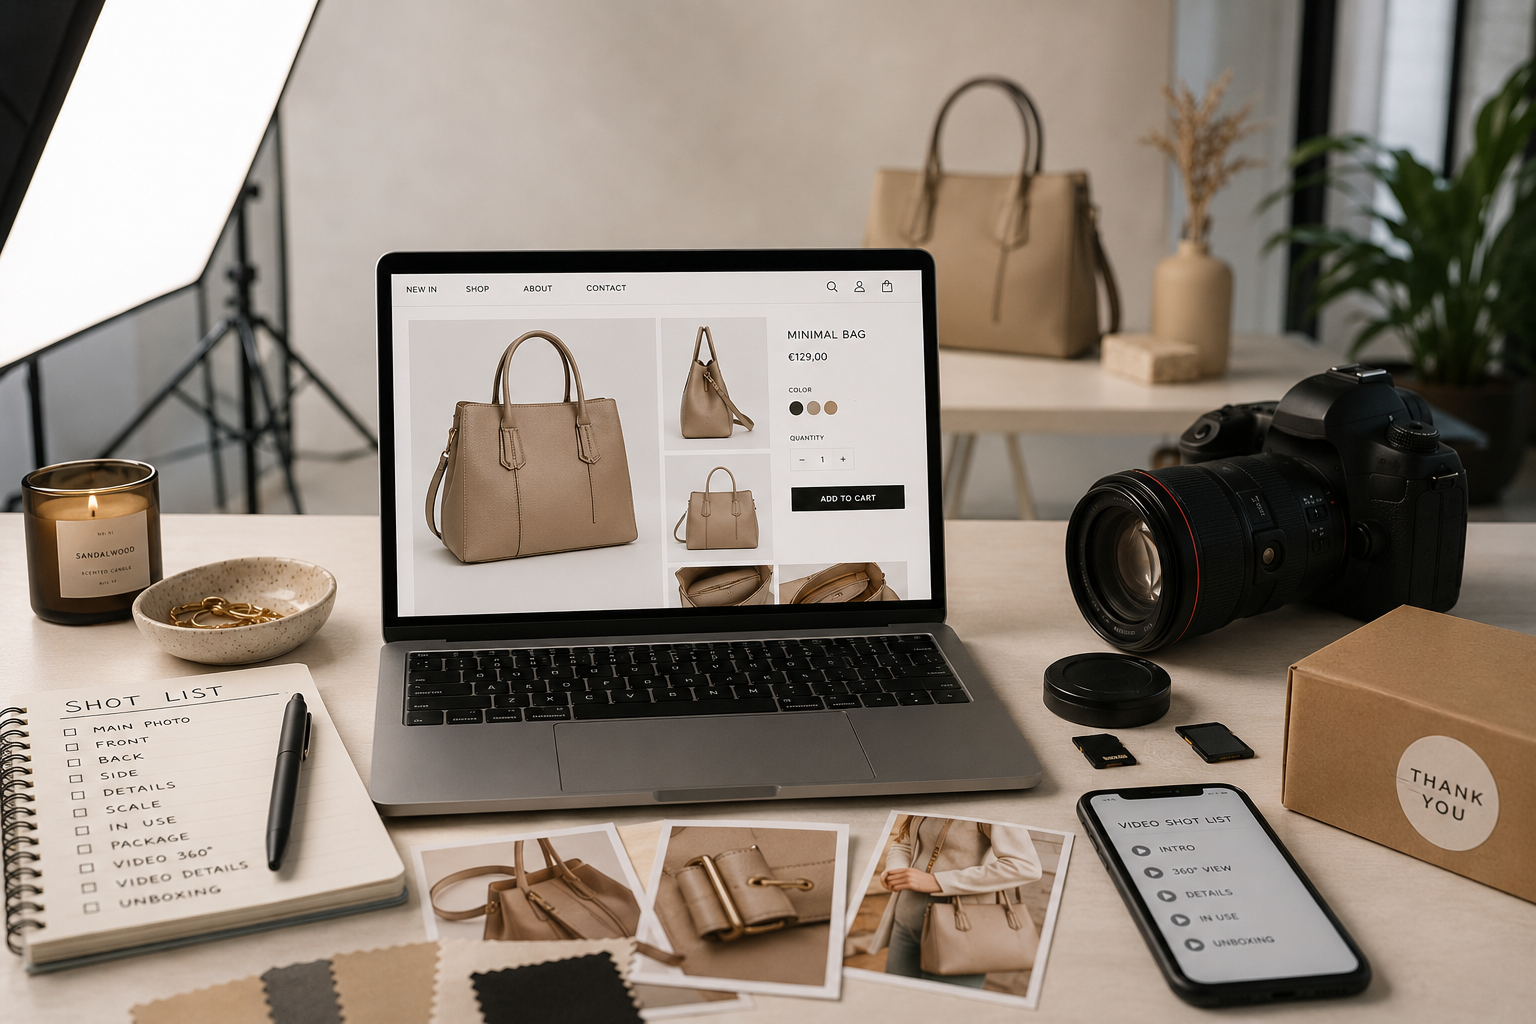
In a physical store, customers can turn a product around, check the fastening, look closely at the fabric, and understand its size. On a website, visual content has to do this job. If the images leave questions unanswered, even a beautiful main photo cannot save a product page.
It is easier to plan a session not around the idea of “let’s take lots of photos,” but around the customer’s questions. What does the product look like from the other side? What is included? How does it behave in motion? Below is a set of photos and videos designed for different product categories and channels.
It is easier to plan a session not around the idea of “let’s take lots of photos,” but around the customer’s questions. What does the product look like from the other side? What is included? How does it behave in motion? Below is a set of photos and videos designed for different product categories and channels.
Why One Good Product Photo Is Not Enough
The main photo helps customers quickly recognize the product in the catalog. Additional images continue to explain the product: its shape, construction, material, color, packaging, and use. If all photos are taken from the same angle and only the position of the hands changes, the gallery takes up space but explains very little.
Each piece of content should have a purpose. A side view shows the depth of the object, a close-up shows the quality of the stitching or fastening, a photo next to a person shows scale, and a lifestyle scene provides context. Video is useful when movement, fit, transformation, or a sequence of actions is important. It does not have to be just a static gallery accompanied by music.
The same number of photos will not work for every catalog. A candle and a baby stroller require different levels of detail. Consider the complexity of the construction, what is included in the set, the different versions available, and the questions a customer may have before making a purchase.
Each piece of content should have a purpose. A side view shows the depth of the object, a close-up shows the quality of the stitching or fastening, a photo next to a person shows scale, and a lifestyle scene provides context. Video is useful when movement, fit, transformation, or a sequence of actions is important. It does not have to be just a static gallery accompanied by music.
The same number of photos will not work for every catalog. A candle and a baby stroller require different levels of detail. Consider the complexity of the construction, what is included in the set, the different versions available, and the questions a customer may have before making a purchase.
What Photos Are Needed for Almost Any Product?
The basic framework should be treated as a menu rather than as a requirement to take eight photos for every SKU.
Photograph different colors and versions separately. The real product is more reliable than a digitally altered image whose shade may not match the item delivered. Editing can remove dust and minor imperfections from a photo, but it should not change the shape or texture of the product.
Organize the series in a logical sequence: a clear and recognizable overall view, important sides, details, and finally context. This makes it easier for customers to examine the product than when catalog photos and lifestyle images appear in no particular order.
- Main photo — clean and easy to understand even when displayed as a small product thumbnail
- Front, side, and back views — when the sides are genuinely different
- Three-quarter angle — helps show width, depth, and shape at the same time
- Close-ups — texture, stitching, hardware, connections, and controls
- Scale — the product in a hand, on a model, next to a familiar object, or in an interior
- Package contents — everything the customer receives together with the main product
- Packaging and labeling — when important for choosing the product, giving it as a gift, or confirming the version
- Product in use — a clear scene without unnecessary props that could be mistaken for part of the product
Photograph different colors and versions separately. The real product is more reliable than a digitally altered image whose shade may not match the item delivered. Editing can remove dust and minor imperfections from a photo, but it should not change the shape or texture of the product.
Organize the series in a logical sequence: a clear and recognizable overall view, important sides, details, and finally context. This makes it easier for customers to examine the product than when catalog photos and lifestyle images appear in no particular order.
What to Show for Different Product Categories
The universal list ends where the specific characteristics of each category begin. Focus on photographing what cannot be understood from the product name and description alone.
Clothing and Footwear
Clothing needs to show the fit: front, side, and back views, length, shoulder line, and fabric movement. Add close-ups of the material, stitching, hardware, and lining. For footwear, show the profile, toe, heel, sole, and the product being worn. A loose fit or transformation of the garment can be demonstrated with a short movement.
Jewelry, Bags, and Accessories
Small objects need an easily understandable sense of scale. Photograph jewelry in close-up and on a person, and show the fastening, back, and texture. For a bag, show its shape, internal compartments, strap length, hardware, and capacity.
Cosmetics and Perfumes
Show the packaging, dispenser, volume, color, and texture. For makeup, a carefully photographed swatch under neutral lighting can be very useful. For a cream, show the consistency and how it is applied. Do not use a photo to promise an effect that has not been proven, and do not hide the true color through excessive editing.
Home Products
Show the product in an interior and next to objects that make its scale easy to understand. For tableware, the rim, handle, and top view are important. For textiles, show the weave, reverse side, and drape. For lamps, show the product both switched off and switched on.
Children’s Products
Dimensions, package contents, fastenings, and the way the product is used are especially important here. Show folding, adjustable, and removable elements. Decoration should not make it difficult to distinguish the product from the props.
Lifestyle photos do not replace an accurate catalog, but they help communicate the brand’s personality and the context in which the product is used. The process of building a series through wide shots, details, and action is explained in more detail in the article about visual storytelling in photography.
What Videos Does an Online Store Need?
Video makes sense when it adds information that is difficult to communicate through photography. There are several useful formats for a product page.
Do not try to put everything into one long video. For a complex product, it is more useful to have a separate presentation and a short tutorial. An instruction such as “show how the zipper closes” is much more specific than “make a beautiful video of the bag.”
Check the first and last frames, the model’s hands, reflections, and the background. If the video is watched without sound, the action and short captions should be enough to understand the message. Music and transitions cannot fix a demonstration in which the main feature is constantly hidden by a hand.
- Short moving presentation — rotation of the product or model without abrupt cuts
- 360-degree presentation — when it is important to show the shape from all sides
- Function demonstration — opening, folding, adjusting, or switching on
- Unboxing — packaging, the order of the items, and the complete contents
- Tutorial — a few steps showing how to use or assemble the product
- Demonstration with a model — clothing fit, strap length, movement of the fabric or accessory
Do not try to put everything into one long video. For a complex product, it is more useful to have a separate presentation and a short tutorial. An instruction such as “show how the zipper closes” is much more specific than “make a beautiful video of the bag.”
Check the first and last frames, the model’s hands, reflections, and the background. If the video is watched without sound, the action and short captions should be enough to understand the message. Music and transitions cannot fix a demonstration in which the main feature is constantly hidden by a hand.
How to Adapt Materials for Your Website, Marketplaces, and Social Media
A single session can generate materials for several channels, but using them without adaptation can be risky. Each platform has different goals and requirements.
On your own website, it is important to maintain a consistent catalog style, good detail, and an appropriate file size. Keep the same product scale and a similar position within the frame for each category. More atmospheric photos can be used as additional images or banners instead of replacing the main image.
Each marketplace has its own current image requirements. Before uploading files, check the platform’s rules regarding background, aspect ratio, permitted text, watermarks, and the number of additional images. For example, Google Merchant Center has specific rules for additional product images. These rules should be checked directly before publication rather than saved as a permanent list of dimensions that may become outdated.
For social media and advertising, vertical framing, movement, emotional context, and negative space for headlines are more common. It is better to shoot both vertical and horizontal versions of the main scene in advance. If time is limited, leave some space around the edges: framing that is too tight is difficult to adapt for Stories or a banner without cropping the product.
Catalog photography and lifestyle photography have different purposes. Shopify describes the lifestyle approach as a way of showing a product in a real-life situation. This provides context and gives the brand personality, but it does not replace the neutral photos customers need to examine the product.
On your own website, it is important to maintain a consistent catalog style, good detail, and an appropriate file size. Keep the same product scale and a similar position within the frame for each category. More atmospheric photos can be used as additional images or banners instead of replacing the main image.
Each marketplace has its own current image requirements. Before uploading files, check the platform’s rules regarding background, aspect ratio, permitted text, watermarks, and the number of additional images. For example, Google Merchant Center has specific rules for additional product images. These rules should be checked directly before publication rather than saved as a permanent list of dimensions that may become outdated.
For social media and advertising, vertical framing, movement, emotional context, and negative space for headlines are more common. It is better to shoot both vertical and horizontal versions of the main scene in advance. If time is limited, leave some space around the edges: framing that is too tight is difficult to adapt for Stories or a banner without cropping the product.
Catalog photography and lifestyle photography have different purposes. Shopify describes the lifestyle approach as a way of showing a product in a real-life situation. This provides context and gives the brand personality, but it does not replace the neutral photos customers need to examine the product.
How to Create a Shot List and Prepare for the Session
You can keep the shot list in a simple table. Each row corresponds to a photo or video with a clear purpose, and the columns can include:
Start with the shots without which the product page cannot be published: the main photo, important sides, details, scale, and package contents. Then add lifestyle scenes, advertising content, and video. In the studio, group products by background, lighting, and props. Rebuilding the same scene for every SKU takes more time than photographing the whole group consecutively.
For a more compact catalog, you can choose a self-service photo studio in Porto: the camera, lighting, and live result preview are already set up, allowing you to shoot independently and check the angles immediately. On AR Porto’s business page, the reference point for 60 minutes is 3 to 5 looks or setups, 50 to 200 photos, and 5 to 15 short videos. The actual volume depends on the number of products, preparation, and the complexity of the production.
If you need to photograph a large collection, a complex advertising scene, or several models, one hour of self-service shooting may be too limited. In this case, it is better to divide the catalog across several shooting days or arrange a full production in advance with a stylist, models, and a specific equipment plan.
- product or SKU
- purpose of the material
- channel
- orientation
- shot and angle
- action
- props
- model
- priority
Start with the shots without which the product page cannot be published: the main photo, important sides, details, scale, and package contents. Then add lifestyle scenes, advertising content, and video. In the studio, group products by background, lighting, and props. Rebuilding the same scene for every SKU takes more time than photographing the whole group consecutively.
For a more compact catalog, you can choose a self-service photo studio in Porto: the camera, lighting, and live result preview are already set up, allowing you to shoot independently and check the angles immediately. On AR Porto’s business page, the reference point for 60 minutes is 3 to 5 looks or setups, 50 to 200 photos, and 5 to 15 short videos. The actual volume depends on the number of products, preparation, and the complexity of the production.
If you need to photograph a large collection, a complex advertising scene, or several models, one hour of self-service shooting may be too limited. In this case, it is better to divide the catalog across several shooting days or arrange a full production in advance with a stylist, models, and a specific equipment plan.
Common Mistakes in Product Photos and Videos
Repeated angles take up space in the gallery without adding information: there may be many photos, but the back, fastening, or interior still remains unseen. Before moving on to the next product, compare the results with your list and check what has not yet been shown.
Excessive editing can alter color and texture. Old packaging may not match the current product, and props may appear to be part of the set. The composition should make it clear which elements the customer is actually purchasing.
It is also common to forget about scale, product cleanliness, and safe framing. Wrinkled clothing, dust on glossy packaging, and a cropped bag strap are especially noticeable in close-ups. In video, another common mistake is starting to record without a clear action. The result is a long video that does not answer any specific question.
Before finishing the session, do a quick check: is there a main photo, all important sides, details, scale, package contents, accurate color, a photo of the product in use, and the necessary videos? Have vertical versions been photographed? Is anything hidden by a hand? Does the packaging match the current version? Returning to the studio to photograph one forgotten angle usually requires more organization than doing this check at the end of the session.
The shot list always depends on the product, but the logic is simple: first, show the product accurately; then show the context; and only at the end move on to the advertising presentation. You can plan a self-service business content session with a ready-made shot list. For a large collection or a more complex campaign, you can send the studio team a brief for a full production.
Excessive editing can alter color and texture. Old packaging may not match the current product, and props may appear to be part of the set. The composition should make it clear which elements the customer is actually purchasing.
It is also common to forget about scale, product cleanliness, and safe framing. Wrinkled clothing, dust on glossy packaging, and a cropped bag strap are especially noticeable in close-ups. In video, another common mistake is starting to record without a clear action. The result is a long video that does not answer any specific question.
Before finishing the session, do a quick check: is there a main photo, all important sides, details, scale, package contents, accurate color, a photo of the product in use, and the necessary videos? Have vertical versions been photographed? Is anything hidden by a hand? Does the packaging match the current version? Returning to the studio to photograph one forgotten angle usually requires more organization than doing this check at the end of the session.
The shot list always depends on the product, but the logic is simple: first, show the product accurately; then show the context; and only at the end move on to the advertising presentation. You can plan a self-service business content session with a ready-made shot list. For a large collection or a more complex campaign, you can send the studio team a brief for a full production.
ar.portostudio@gmail.com


AR Porto Selfie Studio © 2026


Leave a request
Our manager will contact you for booking
